Introduction to Photoshop: Imaging Concepts
Created by Health Science Librarians

Ask Us
We are here to help!
Classes
Phone (919) 962-0800
Text/SMS (919) 584-5931
Imaging Concepts
Image size, resolution, and print size
Digital images are made up of pixels (picture elements), which can be defined as colored squares. Each pixel is only one color.
A good way to learn about image size, resolution, and print size is to experiment with an image using the Image Size dialog box. To do this, open an image in Photoshop. Then choose Image > Image Size, and the Image Size dialog box appears.

Under Pixel Dimensions, Width and Height refer to the number of pixels in an image, which has to do with the size of display on screen.
Under Document Size, Width and Height refer to the size of the image when printed.
For Online Display
If you are placing an image on the Web, you may want to resample the image (add or delete pixels) in order to change the display size of the image. To resample, make sure "Resample Image" is checked. Unless you want to distort your image, also be sure that "Constrain Proportions" is checked. Then type in a new number of pixels in either the width or height field of Pixel Dimensions.
Sampling up (increasing the number of pixels) makes images larger on a display screen. For sampling up, we suggest that you choose the Bicubic or Bicubic Smoother option from the Resample Image dropdown menu.
Sampling down (decreasing the number of pixels) makes images smaller. For sampling down, we suggest that you choose either Bicubic or Bicubic Sharper from the Resample Image dropdown menu.
Note: The resolution at which an image will display on a monitor is not related to image resolution. Typically the display resolution is around 100 pixels per inchi. This is the case regardless of the setting under Resolution in in the Image Size dialog box. You do not need to be concerned with this setting if you are placing the image on the Web; it only applies to printing.
For Printing
For printing purposes, you may not need to resample your image. Sampling down reduces the number of pixels, which degrades the quality of the print (but does have the advantage of lowering file size). Sampling up (adding pixels) is not usually necessary, because to increase the print size a better method is to lower the resolution rather than sampling up. (Sampling up would unnecessarily increase the file size.)
To change the print size of an image without resampling, uncheck the "Resample Image" box. When you turn resampling off, notice that the Pixel Dimensions are no longer editable.
Under Document Size, there is a tradeoff between Width and Height and the Resolution. If you increase the width and height, resolution decreases. If you increase the resolution, width and height decrease.
As a general guideline, newsletters and newspapers are likely to require resolutions in the range of 150 to 200 ppi, and magazines are likely to prefer high resolution images of 250 ppi or more.
A resolution of more than 300 ppi may be unnecessary. But keep in mind that if you crop the image and then enlarge the cropped image to the size of the original, the resolution will be lower than the original... so an image that was 300 ppi, then cropped and enlarged, may then be much less than 300 ppi.
For more information about resolution and print size, see video below.
Imaging video demonstration
Color Modes
Color Modes
In Photoshop, you are always working in a color mode. The default mode is RGB (Red-Green-Blue), which is also the default mode for the Web. If you are only working to create color images for the Web or for a desktop inkjet printer, you may not need to use any of the other modes. But it is useful to know about modes because this gives you a better idea of how Photoshop creates images.
Each color mode defines the colors that combine to make up the color of every pixel in the image. To change color modes, choose Image > Mode.
Color modes are made up of channels. Each channel is a grayscale image. A grayscale image is an image made up of shades of brightness (as many as 256 shades, from white to black). To view the channels, choose Window > Channels, and the Channels palette will appear. Modes with fewer channels result in smaller file sizes.
For example, in RGB mode, the red channel is a grayscale image made up of brightness values for the color red; the green channel is made up of brightness values for the color green; and the blue channel is made up of brightness values for the color blue. Each pixel in the full color image is made up of a combination of of brightness values for red, green, and blue.
Note: It is possible to edit an individual channel, which is useful to improve the quality of some images. Detailed techniques for working with channels are beyond the scope of this tutorial. For more information refer to one of the resources listed in the Welcome section.
Some of the most frequently used color modes are:
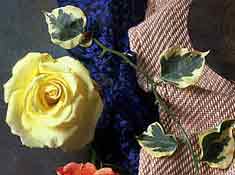
RGB mode
|
 |
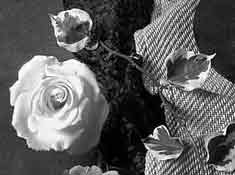
Grayscale mode
|
 |
Bitmap mode
|
 |
Indexed mode
|
 |
CMYK mode
-
four channels (Cyan, Magenta, Yellow, Black)
-
used by professional printing houses. If you are producing a images for a publication or poster, you may need to save it in CMYK mode.